
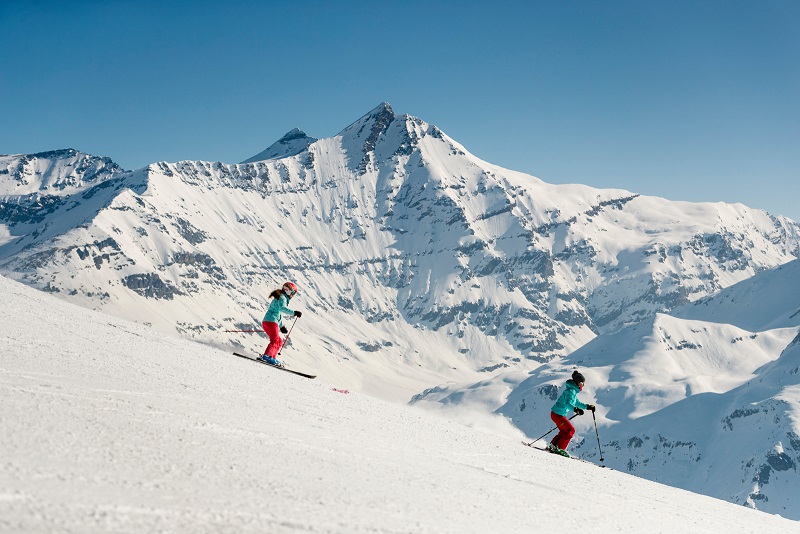
So, you’ve got a few weeks skiing under your belt from previous years or are a regular at one of the Friday night dome sessions in the UK and you’re looking to open up the mountain and make it your playground for the next week.
We at Chardons have compiled an easy guide to skiing the Espace Killy for intermediate riders for you to make the most of your holiday in the Alps. Below is a suggested three day plan, based on our experience in the Espace Killy, for you to feel both safe and challenged as an intermediate rider in the region. It’s not an exhaustive list but might be a good place to start especially if you’ve never been to the resort before.
Day 1:

First, we recommend taking the Brevieres bubble car out of Les Brevieres to do a couple of runs of the blue run “Meleze” which blends into “Myrtilles” for a nice long warm up. This run does have some steeper points and some trickier parts on the narrow bends so it’s a great loosener to get all the joints working in unison again.
Once you’ve done a couple of runs on here you can take the Brevieres gondola up to the top again and from here head to the furthest lift you can see – the Aguille Rouge. Be careful not to get on the Marais chairlift as this lift is painfully cold, slow, and long (plans are afoot to update this lift very soon making the trip to the “Eye of the Needle” far quicker)!
From the top of the Aguille Rouge you have two options to get into Tignes Le Lac. You can either take the red run “bluets” which is nice early in the morning but can get a little chopped up as the day continues. There are a couple of steep pitches in here but the run is fairly wide all the way which balances out the steepness.
Alternatively, if you’re not quite feeling confident enough for a red, you can turn off on to the lovely “Petit Col” run which is great for cruising down and will take you all the way into Tignes Le Lac at the bottom of Palafour. However, bear in mind that this run is not so good for snowboarders because there is a long flat at the end.
Depending on how many laps of the “Summer Road” you did in the morning, this should bring you to about lunch time and you’re in the perfect spot to stop for a bite to eat. You have several spots to choose from around Le Lac. One recommendation would be the Patisserie du Palafour. A hidden gem, the Pattiserie is almost solely frequented by ski instructors and seasonnaires. To the left of the ESF office is a door which seems as if to nowhere. Walk through this door and on the left you will find the patisserie, where cakes, coffee and sandwiches (hot and cold) provide a perfect little snippet of French lunch.
Alternatively, the large white building you can see from the piste is the Escale Blanche where you can get traditional French cuisine or freshly made pizzas with wine and beers, all for a reasonable price (by mountain standards). Or you can go to L’Arbina which has a lovely big sun terrace and again serves traditional Savoyard cuisine. If you see the big Bernese Mountain dog outside you’ve got the right place.
Or you can opt for more of a pub lunch. You’ve got two really nice pubs for lunchtime meals: try either The Moose or The Marmot Arms, both located just up and left from the Palafour lift. These pubs are both English run and are nice spots for something a bit more substantial to eat, and good for a lunchtime beer!
So you’ve finished lunch and are ready to get back on the slopes. My recommendation would be to take the Toviere bubble up to the top of Tignes Le Lac (take a look at the stunning view from the top here). From here you have several options to get into Val Claret. You can take the blue piste “Henri”, which is one of the classic blues of the Espace Killy, or the top half of the Red “Crocus” which then joins “Henri” further down. Follow this all the way into Val Claret.
From Val Claret take the Tichot lift and then the Grattalu lift. Here you can take either a blue or red run under the Merles chairlift and down to the Grand Huit lift. Pay attention to the area to the left of the lift – this is a classic area: The Chardonnet Bowl.
From the top of the Grand Huit you have two options: the blue “Pierce Neige” or the red “Ancolie” down to the Aguille Percee lift. This will take you to the highest point on this side of the hill – ‘the Eye of the Needle’ – and the entrance to the Sache Valley. From here you have one full run all the way back to Tignes Les Brevieres. The blue “Cornice” blends into “Rhodedendrons” and then into “Melezes” and you’re back home in Les Brevieres in good time for a bit of apres at The Boot Room!
Day 2:
After some good exploring of the Tignes side of the mountain yesterday, try heading over to the other side of the mountain for your second day. So put on your tightest trousers, grab your fur hood, and prepare the Moet: we’re heading to Val d’Isere.
To get there, jump in the Brevieres bubble and then from the top head to the Marais chairlift which takes you to the top of the ‘Eye of the Needle’. Take the red run “Cyclamen” – this can be a little icy first thing but when it’s good, it’s brilliant. This is a long flowing red run wide enough to practice those big turns while steep enough to test your speed control. This blends into a blue run which will eventually re-join “Kadjar” and take you into Tignes Le Lac – what a way to start the morning!
Once in Le Lac, hop on the Toviere bubble and head on up. From the top of the Toviere, take the “Fresse” green run down to the Marmottes chairlift. The restaurant just up from here is another lovely place to stop. It’s called Marmottes and has cheap hot chocolate and self-service beer.
At the top of the Marmottes chairlift you have two options and both are absolute classics. “OK Orange” (the K coming from Mr Killy himself) is a steep, rolling red run. Here you will often find race gates set up on one side for the young French elite teams training but stick to the other side of the piste and you’re in for one of the best and most committing red runs in all of Europe. This run can take you all the way into La Daille but the top section is where the thrill really lies.
The other option is a classic blue – “Diabold” – which follows a similar line to the “OK Orange” but on slightly more forgiving terrain. Whichever option you go for, follow it all the way down to the bottom and into La Daille.
From La Daille you can either get the bus to Val D’isere for the quick option or you can go back up the Funicular from La Daille and ski the famous red “Santons”. If you get to the top and the Santons is closed, I would recommend heading down into Val town centre using the Olympique bubble.
Once in Val d’Isere have a look round, take it all in, and if you’re feeling a bit peckish there’s a lovely little panini shop on the face of the nursery slope which is very reasonably priced and also a fun place to sit and watch all the skiers as they come down the mountain!
We probably need to start heading back towards Tignes now, so hop back in the Olympique and up to the top. From here follow “Diabold” or “OK Orange” back down – passing the famous La Folie Douce and head for the Tommeuses chairlift.
Once at the top, if you’re feeling really adventurous and feel like you’ve been skiing well, you can ski down the black “Trolles” run to Lavachet to get the Chaudannes lift. Once at the top of the Chaudannes, follow the blue or the red run all the way back to Les Brevieres and that’s another great day on the hill completed. However, this run is quite a steep and narrow and a real bottle neck, so for young families we would recommend getting the Toviere bubble down instead.
Day 3:
For the third day of the guide we’re going to head to the highest point of the resort first, so use the quickest way you’re comfortable with to get into Tignes Le Lac. Our suggested route would be the Brevieres bubble, followed by the Aguille Rouge chairlift and then take the red run into Le Lac.
Once in Le Lac, head up the Palafour chairlift. You then have two options from the top of Palafour. We would recommend going right and then when it straightens out at the bottom, cross straight over both junctions and head for the Merles chairlift. From the top of the Merles you can make your way on to the “Grattalu” run. Here you will find the beginners snowpark if you wish to have a little go at getting airborne. Or if not, you can just take the nice long piste which runs into “Carline” all the way into Val Claret.
Once in Val Claret, take the Funicular up the hill to the Panoramic restaurant, where you then walk around the restaurant to the cable car. You will probably have a short wait here but head up in this lift to the very top of the Grand Motte which is the highest point in the resort.
From the top of the Grand Motte you have a red and black option. We would recommend the red “Glacier” – a long, sweeping red which carries you all the way into “Double M”. This is one of the quickest red runs in the resort but it’s relatively open for the most part and is great fun – another Tignes classic.
Once back in Val Claret, take the Fresse chairlift and head towards Val d’Isere again for a few more runs. From the top of the Fresse lift, jump on the Borsat chairlift, which will take you to the top of a lovely cruisey green “Genepy” which you can use to get to the Grand Pre chairlift. Take this chair up and then it’s time for you to find out who’s who with a quick boardercross!
This course has some great little rollers and some big banked turns: a test of skill and confidence to find out who’s top of the game. From the bottom of the course you can follow “Santons” down into Val d’Isere and to the Solais bubble.
The little café at the top of the Solaise is a perfect spot for a lunch stop. Here there is cheap coffee and cakes with a free table football and cinema area – the perfect place to stop and refuel before tackling “Piste M” back into Val town centre.
From here feel free to make your way back home using any number of the different routes we’ve explored over the last couple of days.
This is how we think you should spend your first 3 days in resort if you are an intermediate skier or boarder. If this wasn’t enough of a challenge check out our advanced guide which will be dropping soon!